Getting Creative: Gore Makeup
Tips and tricks to get ready for Halloween
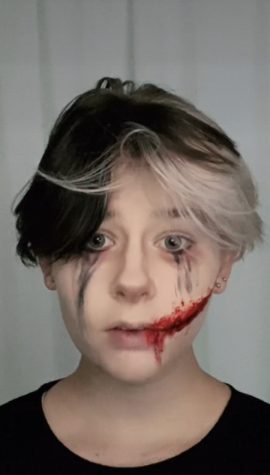
The world of gore makeup: an amazing yet frustrating place for newer makeup artists. Being one myself, I thought I would take a shot at this gory form of creativity. I tried a few different techniques to create the fake wounds I wanted. Some techniques ended up being easier than others, but overall, they were all complex. However, with a little time and effort, I think it would be fairly easy to improve my skill level.
I started off by watching many different YouTube tutorials to find the supplies I would need. Liquid latex was a prominent material used in the tutorials I watched. The smell may make your eyes water, but it makes it so much easier to get prosthetics, fake skin, and other special FX products to stick to your face. The trick is to not use too much or too little. It’s something that requires a little bit of trial and error.
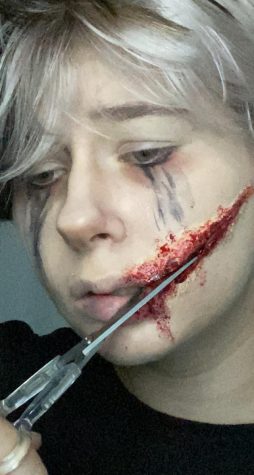
Another important product was scar wax, which is a wax that looks like skin. I tried to use it, but it didn’t work for the wound I wanted. I was attempting a Jeff the Killer style mouth and since the skin around your mouth is soft and flexible, it wouldn’t work. However, the scar wax worked pretty well when I did a small cut on my hand. Since my hand is bonier and harder, I could spread the wax easier and blend it with my skin. The last thing you might need is color corrector. Color corrector can help make the latex and fake skin look more like your natural skin color. I did not use color corrector since I did not have it on me. So it is not necessary but I did have to use a lot of foundation to combat the fact that I did not have it.
Money was another issue I had when doing this. Gore makeup can be extremely expensive. All makeup can be, but gore makeup is much more so. There are a few things you can do to avoid buying expensive products, such as instead of buying scar wax, you can use toilet paper. I saw many tutorials use a light layer of latex and then put toilet paper in the shape of the wound they wanted. Once it was dry, they gently applied more latex on top and added another layer of toilet paper. They did this three or four times and then let it dry. Once it was dry they then added foundation, color corrector, and fake blood until they were content with how it looked. I found this technique to work really well for me and it made it much easier to create my own wound.
When it comes to fake blood, you don’t have to buy it. If you use 1 tablespoon of cornstarch, ½ tablespoon of chocolate sauce, and a few drops of red food coloring, you can make edible fake blood.However, be careful with it , as this stuff can stain just about anything it touches, including your teeth. If you get it on things like your clothing, quickly wash it in the sink or washing machine so you can get most of it out.
There are a few things to remember when doing gore makeup. First, it might not be perfect your first few tries and that’s okay. In fact, wounds and gore are messy and gross, so not being perfect might just be better than “perfection”. Secondly, if you go for cheaper alternatives, make sure not to buy bad quality products and don’t go so cheap that your techniques could potentially injure yourself. For example, the first time I did gore makeup, I used Elmer’s Glue to apply the fake skin and it was super painful to get off. Lastly, be careful. Fake blood and latex are messy and if they get on things, they could stain them or mess them up. Overall, just have fun with it, scare as many people as possible, and have a great Halloween!
TW FOR THE FOLLOWING PICTURES: GORE/DARK THEMES